Nov 22, 2015: If you’re new to candle making, tealight candles are a great place to begin. They’re easy, can be colored or fragranced for any season, and add ambience to a home environment or special occasion. You can adjust the amount of materials according to how many tea lights you want to make.
Prior to the use of electricity, candles were the only artificial light source. Candles have been in use as early as 3000 BC. At that time of course, they were always made by hand with little consideration towards decorative beauty. As candles found use in religious services of many beliefs, some variation in size, shape, or materials used began to emerge. Once electricity became commonplace, candles were no longer needed for an artificial light source. Most homes today have several candles on hand for celebrations such as birthday candles, or a well-placed touch of romance to a candlelit dinner. Scented candles can also set a mood, or help to relieve stress.
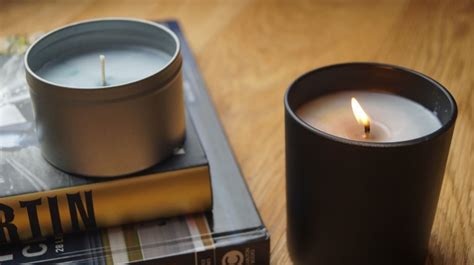
Early candles were made in the home, generally with whatever wax was available. As modern production of candles began outside the home, candles became available in a wide range of styles, colors, scents, and price ranges. Along with everything else in the economy, candle prices have continued to climb. Have you ever thought about making your own candles? Look around right now and notice what candles you use on a regular basis. Pillar candles, votive candles, and candles in a jar, are all very popular. They are also some of the easiest to make at home. By learning to make your own candles, you can control the cost, color, scents, and styles without worrying that your favorite candle will be discontinued or another price increase puts it out of range of your budget. Look at this guide for beautiful and fragrant candles and let’s get started!
Step 1: Gather Supplies
The first thing you need to do is to gather all the supplies needed. Gather them in one work area where you have room to set up your molds and pour wax without being crowded. Always keep safety first in mind and be sure there are no small children or even pets underfoot that can be burned with hot wax. Most candle supplies or crafts stores that carry candle making equipment that can help get you started, but here is a list of equipment and supplies you will need. Don’t let this list keep you from exploring the fun craft of candle making. Many candle making supply or craft stores have a basic candle making kits that carry just enough to get you started on your first few candles. You can later expand your equipment based on how many candles you desire to make. An average start up kit can easily be found for $50 -$100. Some craft stores offer introductory classes for as little as $20 including the supplies to make your first candle.
For home candle making here is the equipment you will need.
Double boiler
Pouring container
Thermometer
Home kitchen food scale
Wax
Wicks
Molds
Mold Sealer
Wick holders
Silicone mold release spray/additives
Dyes
Scent
Mold Cleaner
For your first candle making project, you can likely get by with using a pan for hot water and a coffee can to melt your wax in before buying a double boiler. A candy thermometer may also be used for wax, vegetable spray for a mold release option, and dyes and scents, while adding a nice touch are not essential to produce a good basic candle as you become acquainted with basic candle making steps and techniques.
Step 2: Prepare the Wax
How much wax you need per candle depends on what size and type of candle you are making. It also varies according to the type of wax you are using. Not all wax yields the same volume of liquid wax when melted. Most home candle makers use paraffin, but if you plan to mix paraffin with the other two commonly used waxes, you need to remember:
A 1- pound block of Paraffin wax equals approximately 20 liquid ounces when fully melted.
A 1- pound block of Soy wax equals approximately 18 liquid ounces when fully melted.
A 1- pound of Beeswax equals approximately 16 liquid ounces when fully melted.
Trial and error will determine exactly how much wax is needed as other factors such as wax temperature when poured; room temperature, and even the temperature of a mold or container, will determine how much wax is used for each new project. There are online calculators available but a home kitchen scale is an easy tool to use to get a good idea of the amount of wax you will need. First, weigh your empty candle container or mold and write that number down. Next, fill your container or mold with water and reweigh it. Subtract the weight of the empty container from the second number. For example, your empty container weighs 4 ounces. Filled with water, it weighs 7.2 ounces. Subtract 4 from 7.2 and you have 3.2 ounces. That (3.2 ounces) is how much melted wax you need for that one container.
Step 3: Placing Wick Pins
Wick pins are ideal for votives, tea lights, and small pillar candles. Before placing wick pins in your molds, check to be sure pin alignment is straight. Place a wick pin in the center of each mold before spraying molds with mold release spray. The use of wick pins will assure you of easily inserting a straight wick once the candle has cooled enough to be unmolded.
Step 4: Preparing the Double Boiler
Due to the danger of wax becoming hot enough to reach a flash point and exploding in flames, never melt wax over direct heat! The most common way to melt wax safely for your homemade candles is to use a double boiler. Simply, a double boiler is two pans that set inside each other. The first pan contains hot water and a second smaller pan is set in or over the hot water until the wax melts and reaches the temperature needed for the type candle you are making. If you have purchased a pouring pot for your liquid wax, you can easily improvise a double boiler by placing a medium pot of water on the stove with 1-2 inches of water. Place your wax-filled pouring pot into the water-filled pot. You want enough water in the pot at all times to heat your wax but be careful not to add so much water that the pouring pitcher floats, as dangerous spills may then occur! If you purchase a double boiler, the upper pan usually rest suspended on top the water-filled pan. Double boilers can be purchased in kitchen supply stores or online. Read and follow manufactures’ directions. A simplified double boiler with poring pot is illustrated in the link below.
Step 5: Melting the Wax
When melting wax, keep safety in mind at all times. Never melt wax over direct heat. Wax is flammable. If overheated, wax can quickly explode into flames. Properly melting wax to recommended temperatures does not require heating wax to the high temperatures known as a flash point. Never leave melting wax unattended. Be prepared to douse unexpected flames with a fire extinguisher or by covering them with a lid from a pot. Attempting to put out a wax fire with water will only spread the flaming wax elsewhere.
How long it will take melt wax over a double boiler depends on the amount and type of wax, as well as the temperature the wax needs to reach according to the kind of candle you are making. Properly melted wax is clear and looks like water.
Step 6: Add Coloring & Fragrance
Adding color and fragrance is done after your wax has completely melted. Use coloring made for candles. While it is possible to recycle melted crayons to color a candle, the dyes and impurities in the crayons will cause your candle to sputter and burn unevenly. There are several candle dye options so be sure to read and follow the directions included on the package for best results. Remember, the candle color will lighten as the candle cools.
Adding fragrance can be a bit tricky. Determining how much fragrance to use per candle depends on the fragrance, as well as the type and size of the candle. While most guidelines call for one ounce of fragrance per one pound of wax, it will depend on the strength of the fragrance as well as the candle wax, type, and size. As you experiment with fragrances, keep notes so you will know how you obtained the perfect color and fragrance for your next project.
Step 7: Finish Preparing Your Molds
While waiting for your melted wax to cool slightly to the proper pouring temperature, check the molds you set up earlier. Once again, be sure the wick pins remain centered properly. Now is the time to spray the molds if you are using a mold release spray. Molds come in a variety of materials. Not all molds will need a release spray, while others will need spraying each time. Read any labels and follow recommendations and guidelines that are given. Always make a trial candle in a new mold to determine any individual quirks that may influence final candle appearance.
Step 8: Cooling the Wax
Knowing the correct temperature at which to pour your wax will determine the looks and characteristics of your finished candle. Correct cooling temperature will reflect in the appearance and the need for a second pour. Improper pouring temperatures for container candles may result in wax pulling away from the sides of the container. Each candle type requires a different temperature. General guidelines are given here, but again, the type of wax used will determine the pouring temperature as well.
Container candles are poured at 190°F
Votive candles are poured at 175°F
Pillar candles are poured at 175°F – 180°F
Tea Light candles are poured at 130°F
If you combine wax or additives, that will also affect the ideal pouring temperature. Candle making often requires trial and error as well as a bit of experimentation to produce the look, feel, and characteristics you want in your finished candle. Good note taking will help you recall what worked and what needs tweaking for the next candle project.
Step 9: Pouring the Wax
Even though you have cooled the wax slightly to the recommended pour temperature, it will still be hot. Handle melted wax carefully to prevent burns. Carefully ladle hot wax into a pour pot or pitcher if it was not melted in a pour pot earlier. If you did use a pour pot to melt your wax, be careful not to let water from the double boiler drip from the pot into your molds. Water in the wax will cause holes and weaken your finished candle. Carefully pour wax to slightly below the edge of the mold. Be sure to pour slowly to avoid dislodging the wick pins placed in the molds earlier. Wax spilled on the counter or floor can be scraped up and re-melted to use in the second pour.
Cooling wax naturally sinks in (concave). Because of this, it is necessary to do a second pour after your candles have cooled long enough to begin to set. For small candles, this will be in approximately an hour. To re-pour, melt remaining wax until it is once again liquid. Place the thermometer into the wax and heat to 175°F – 185° or 10°-15° hotter than the first pour. Pour melted wax to the very top of the molds and allow the candles to completely cool.
Step 10: Removing Candles from Mold
Removing the candle from the mold can sometimes be a bit tricky. Remember to allow the candle to harden completely. If the candle has not completely hardened, removing it from the mold can scar or tear wax from the surface of the candle. Do not rush or try to force a candle out of a mold. If you used a mold release spray and poured the wax at the proper temperature before allowing the candle to cool completely, you should be able to lightly tap the bottom of the mold and gently tug on the wick pin to loosen and remove the candle.
If that does not work, place the mold into very hot water for a few seconds or carefully warm the outside of the mold with a hairdryer. This will slightly melt the surface of the candle and allow it to be removed. You may have to repeat the warming process a couple of times. You want to warm the wax slightly, just enough to cause it to slip out of the mold, not so much that you have a dripping misshapen candle once it does slip out.
Step 11: Placing Wicks
Choosing a wick for your candle depends on the type and size of candle made.
After the candle is free from the mold press, turn candle upside-down and press pin firmly against the tabletop. Remove pin carefully from the bottom. Insert a tabbed wick through the hole left by the pin. Tug the wick from the top to secure it firmly. Wicks should be trimmed to ¼” length prior to lighting.
Step 12: Enjoy!
Congratulations! You have made your first candle. The most enjoyable part of candle making is lighting homemade candles and sharing them with others. With what you have learned through this experience, you can now make candles for every season. Making your own candles may even save you money in the end. If you plan to continue your candle making adventures, keep a written log of candle recipes as you experiment with various waxes, fragrances, and colors. When you find that perfect fragrance combination, the wick that burns just right, or how to mix a favorite candle color, having a record of it will allow you to duplicate the favorites and remember what you planned to change for better results.